Clone of FlexWind: Fatigue Life EXtension of offshore Wind foundations
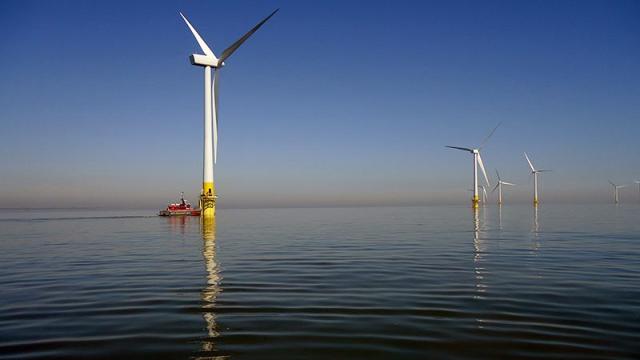
Offshore wind turbines and their foundations are designed for a lifetime of 20 to 30 years. Once this design life has passed, the standard procedure is that the operation of the structure can be prolonged if it is shown that the loading was lower than anticipated during the design phase. This is only possible if accurate monitoring has been performed, and it also neglects the possibility that the structure has actually a larger fatigue resistance than assumed in standards.

But du projet
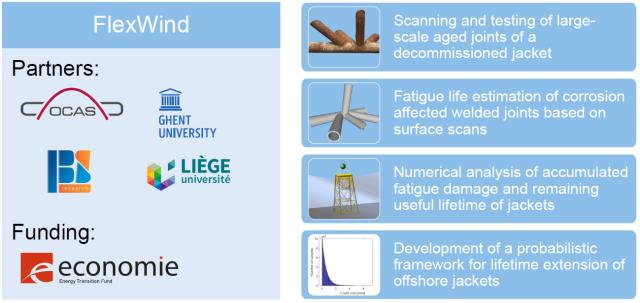
In the FlexWind proposal, we will investigate the possibility to prolong the life of an aged offshore foundation of an offshore wind turbine by re-assessing the fatigue resistance of critical joints of the substructure. To this end, welded joints, including decommissioned node joints, are scanned and subjected to fatigue tests to understand the relationships between scan data and fatigue behaviour. These data are then modelled to determine a residual life. This will be done by innovative methods combining:
- inspection of aged joints (scanning the geometry of critical joints, assessment of the surface degradation due to corrosion),
- numerical analysis of accumulated fatigue damage (backward modelling) and remaining useful lifetime (forward modelling),
- probabilistic tools to account for the inherent stochastic nature of a wide range of parameters affecting fatigue resistance,
- representative experiments on aged large-scale joints of offshore jackets.
The Belgian Welding Institute will carry out laser scanning of welds as well as fatigue tests on welded joints within the project.

Description du projet
Visual inspection of welded components
Today, quality assurance for welded components is carried out off-line, after the production, using standard handheld gauges. Numerous manual gauges are available to assess the weld quality in production, see Figure 1.

Figure 1: Gauges for measuring the local weld geometry. (a/b) Radius measurement tool; (c) Gauge for throat thickness and depth of undercut
However, there are challenges with this methodology :
- Subjective inspection : Manual weld inspection provides only an estimation of measurement values. Also, weld profile features such as convexity, reinforcement, and theoretical throat thickness also show even more subjectivity. There are problems due to the inherent difference between welding inspectors. This results in a low repeatability and reproducibility.
- Unconventional weld types : A skewed fillet weld is an example of a joint configuration that is increasingly common in many industries; however, this is difficult to measure with available manual gauges (Figure 2). The challenges and time-consuming activities include measuring the actual angles and then calculating the required weld leg lengths and theoretical throat values by utilising a manual slide ruler.
- Full weld-length measurement : Traditional visual inspection usually involves looking at the total weld length and then measuring at specific locations. This is time-consuming and leaves open the possibility of missing defects where no measurement was done.
- Accessibility : Although most traditional manual weld gauges are small, there are cases where accessibility is an issue (see Figure 3). To be appropriately utilised, the gauge must be positioned on the base material over the weld and should be seen clearly from all angles to interpret results correctly. Sometimes, due to joint design or location issues, it is not always possible to utilise a traditional welding gauge.
- Non-contact inspection of hot parts : For safety considerations, inspecting with traditional weld gauges typically needs to be performed after the part is cooled to avoid the possibility of burns.
- Difficult-to-quantify features : for example the weld toe radius and angle, undercut, and the ratio of the weld height and width.
It can therefore be concluded that the currently used visual inspection methods are time-consuming and subjective, which makes this system inappropriate for fast production environment where fast feedback of the local weld geometry is required.

Figure 2: Skewed fillet weld where measurement of an obtuse angle is done

Figure 3: Access challenges with manual gauges
Laser scanning
Other methods and tools which can be used for assessing the weld surface geometry are laser profile sensors or vision systems, in which the scanning device is used to acquire the surface. Algorithms subsequently calculate surface features of the joints [1,2,3,4]. This technology is now available mounted on a robot, or in a portable format (see Figure 4 and Figure 5).
Laser inspection devices allow for remote operation, real-time data diagnostics, and measurement of features that are nearly impossible to measure with manual gauges (i.e., weld toe angle, over-welding, and theoretical throat thickness, among others). Other advantages include being non-contact, supporting inspector safety and achieving more repeatable and reproducible results.
The implementation of analysis software that transforms laser line measurements of welded joints into qualitative measurements makes it possible to document larger sections of joints in less time than existing analogue measurement techniques [5].The system ensures a repeatable method that is independent of the operator, which is fast and has the possibility to capture the complete weld geometry continuously with a high resolution.

Figure 4: Laser scanning welding inspection system, mounted on a robot

Figure 5: Manual laser scanning welding inspection system
Measurement equipment at the Belgian Welding Institute
The Belgian Welding Institute is currently investigating this technology using a Keyence laser profiler scanner, model LJ-X8080. The current test setup is shown in Figure 6. The scanner is mounted on a 5-axis robot arm using a flexible fixture.

Figure 6: MIG test piece in setup
The Keyence software is capable of measuring several different features and values. These scans measured for example the resulting angle between the base plates, throat thickness, leg length, undercut, etc.
This scanner shows promising results for the measurement of weld geometry. A wide range of functions can be implemented. In addition, the software allows immediate evaluation of the weld profiles against predetermined values.
The accuracy of the scans seems to be excellent. The resolution is more than adequate compared to the ISO 5817 standard and it's requirements.


Figure 6: MAG weld - throat thickness
Large-scale testing
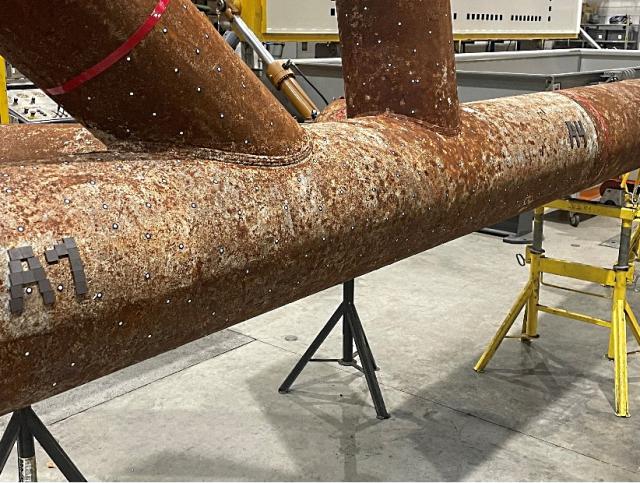
Large-scale welded welded tubular joints from a decommissioned jacket structure which served over 30 years in the North Sea will be tested to determine the actual remaining life. After the jacket structure had been brought to shore, OCAS went to the decommissioning yard to mark the locations to cut the samples. The sampled tubular joints are scanned using a 3D scanner and the scanned data is further processed by UGent.
The samples will be subjected to resonant bending fatigue tests performed by OCAS. The obtained fatigue results will be compared to remaining lifetime predictions.
Figure 7: Marking of the large-scale tubular joints at the decommissioning yard
Figure 8: Setup for 3D scanning of the large-scale samples and scan result
Probabilistic framework for lifetime extension
To quantify the uncertainty on fatigue life predictions ULiège employs advanced statistical methods. The goal is to get a robust understanding of factors influencing the fatigue degradation model. A fracture mechanics based deterioration model is used for this.
Figure 9
References
[1]: Shafeek HI, Gadelmawla ES, Abdel-Shafy AA, Elewa IM (2004) Automatic inspection of gas pipeline welding defects using an expert vision system. NDT&E International 37(4):301–307
[2]: Wu JH, Chang RS, Jiang JA (2007) A novel pulse measurement system by using laser triangulation and a CMOS image sensor. J Sensors 7:3366–3385
[3]: Huang W, Kovacevic R (2011) A laser-based vision system for weld quality inspection. J Sensors 11(1):506–521
[4]: J D Spencer, P M Dickens, C M Wykes. Rapid prototyping of metal parts by three‑dimensional welding. Proceedings of the Institution of Mechanical Engineers Part B Journal of Engineering Manufacture, 1998, 212: 175–182.
[5]: Stenberg T, Barsoum Z, Åstrand E, Ericson Öberg A, Schneider C, Hedegård J (2017) Quality control and assurance in fabrication of welded structures subjected to fatigue loading. Weld World 61:1003–1015


